I'm a huge fan of the ASP.NET MVC framework since it was launched. A few months ago I was forced back to Webforms when I started using the
Sitecore content management system. While trying to combine elements from MVC into Sitecore I found a nice opportunity that allows for Razor syntax to be used to define re-usable renderings. Webforms and Razor together might not be "love at first sight" but after a bit of tweaking it turns out to work quite nicely.
I molded together a module called "RazorForSitecore". This module is backed by the open-source
Razor Engine* and integrates nicely into the Sitecore presentation engine (how?). It can even be combined with other modules that enable strongly-typed classes to be created from templates (e.g.
CompiledDomainModel). This has some benefits like:
- Compile time type checking (views are compiled into memory assembly)
- Intellisense support
(*
PLEASE NOTE: This module uses a slightly modified version of the Razor Engine so that template cache invalidation is made possible!)
The module is available at the Sitecore Shared Source (
RazorForSitecore) library. To use the module you have to do the following (
detailed description):
- Update IIS application pool .NET version to 4.0!
- Install the package from the Shared Source Library (link).
- Update your main web.config file (see below)
- Create your first Razor View
- Add your view to the presentation details of an item
To use RazorForSitecore in conjunction with a module like CompiledDomainModel you have to follow these additional steps:
- Install your strong-typing module
- Create a processor in the "initialize" pipeline that specifies which ITypedModelProvider the module should use
You can download the module from the Shared Source libary: http://trac.sitecore.net/RazorForSitecore
How does this module work?
 The module allows you to create Razor renderings mostly as an alternative to XSLT renderings. XSLT renderings are used for simple presentation elements (from a backend perspective), unlike sublayouts which allow for complex behavior or logic to be implemented. These Razor views cannot contain complex behavior as they are totally unaware of the Webforms lifecycle (they are parsed in a PreRender event of a sublayout).
When you create a 'Razor view' the module automatically creates an item and a corresponding .cshtml template file. However, it also creates an .ascx sublayout to 'contain' and 'integrate' the Razor template into Sitecore. Don't worry, you don't have to do anything with the file it just sits there and inherits from a base class that contains the logic. The module also sets the parameters 'modelType' and 'razorPath' on the item. Don't change or overwrite these or you will die! :)
Creating view helpers
It is possible to extend the view with helper functions through extension methods applied on the SitecoreHelper class. The SitecoreHelper class is exposed as property "Sc" in the view baseclass. This is an example of an extension method that uses the FieldRenderer control and keeps supporting the Page Editor:
public static class RenderingHelpers

   {

     public static string FieldRenderer(this SitecoreHelper helper, Item item, string fieldName)

     {

       Sitecore.Web.UI.WebControls.FieldRenderer r = new Sitecore.Web.UI.WebControls.FieldRenderer();

       r.Item = item;

       r.FieldName = fieldName;

       return r.Render();

     }

   }
Here is a detailed description of the steps involved.
1, 2
This really shouldn't be a problem
3. Update your main web.config file
Add the following section element under configSections:
<section name="razorEngine" type="RazorEngine.Configuration.RazorEngineConfigurationSection, RazorEngine" requirePermission="false" />
Add the following razorEngine element under configuration (right above connectionStrings (as sibling) will do):
<razorEngine>
   <namespaces>
    <add namespace="Sitecore.Sharedsource.RazorForSitecore" />
   </namespaces>
   <templateServices default="Sitecore.Sharedsource.RazorForSitecore.TemplateService, RazorForSitecore">
    <add name="Sitecore.Sharedsource.RazorForSitecore.TemplateService, RazorForSitecore" language="CSharp" />
   </templateServices>
  </razorEngine>
Find the compilation element (at the bottom of the file) and add/change the targetFramework attribute to reflect "4.0" (changing the target framework under Project properties -> Application will also work):
<compilation defaultLanguage=”c#” debug=”false” targetFramework=”4.0” />
Add the following buildProviders element under compilation:
<buildProviders>

   <add extension=".cshtml" type="System.Web.WebPages.Razor.RazorBuildProvider, System.Web.WebPages.Razor, Version=1.0.0.0, Culture=neutral, PublicKeyToken=31BF3856AD364E35" />

 </buildProviders>
Add the following add elements under assemblies (under compilation). Make sure you
remove the
existing add element for System.Data.Linq which is probably pointing to version 3.5.0.0:
<add assembly="System.Data.Linq, Version=4.0.0.0, Culture=neutral, PublicKeyToken=B77A5C561934E089"/>

 <add assembly="System.Web.Helpers, Version=1.0.0.0, Culture=neutral, PublicKeyToken=31BF3856AD364E35" />

 <add assembly="System.Web.WebPages, Version=1.0.0.0, Culture=neutral, PublicKeyToken=31BF3856AD364E35" />
In some cases you need to find the providerOption element and change the value to "v4.0". Don't worry if you can't find it, .NET will throw a nice exception if you forget to change it in that case.
<providerOption name="CompilerVersion" value="v4.0" />
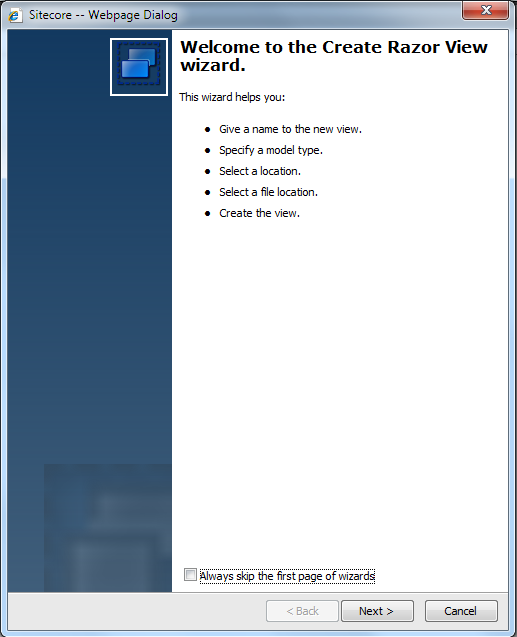
4. Create your first Razor View
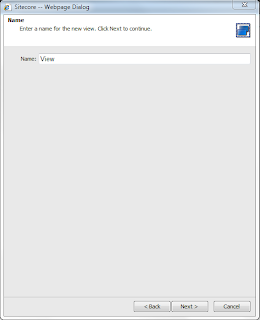 |
| Specify the view name. |
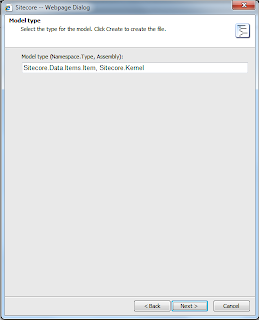 |
The default model type is Item. The module sets the .Model property of the view to the current item in Sitecore.
You should only change the model type if you are using a strong-typing module that converts a Sitecore item into
another type. |
 |
| Items belonging to the views are stored in a fixed location. You can create subfolders if you like. |
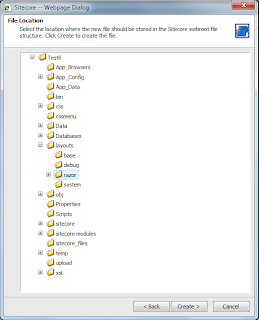 |
The files (one .ascx 'container' and the .cshtml Razor template) are stored in /layouts/razor by default. You can change this
in the /App_Config/Include/RazorForSitecore.config file. |
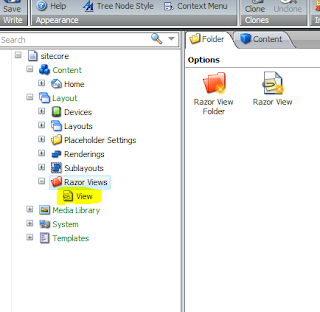 |
| Refresh the content tree to see your view. |
5. Add your view to the presentation details of an item
Additionally: to use CompiledDomainModel as your model provider.
Install the module as described on the module homepage (
link).
Create a processor for the initialize pipeline that registers the model provider, e.g.
namespace Sitecore.Sharedsource.RazorForSitecore

   {

     class RazorProcessor

     {

       public void Process(PipelineArgs args)

       {

         RazorForSitecore.ModelManager.SetModelProvider(new GenericTypedModelProvider(YourDomainModelNamespaceHere.ItemWrapper.CreateTypedWrapper));

       }

     }

   }
- Register the processor in ~/App_Config/Include/RazorForSitecore.config
From this point you can specify your newly created model types instead of the Sitecore Item class.
Enjoy the module and let me know if you find bugs or have suggestions for improvements!